I don’t think it’s a secret that I absolutely love my job. I am so inspired each day and honored that I am able to be creative and capture so many amazing moments, people and things in this world. But today I want to go beyond the camera and explain what comes after a photo session. I will also give tips and advice how to best protect your personal pictures and files.
First off, let’s talk about equipment and computer programs.
I use a Canon 5D Mark III with either a Canon fixed 35mm or 50mm lens. I used to use a Canon EF Lens 24-70mm f/2.8L all the time but realized I shoot better with prime lenses. On my iMac I use Photo Mechanic, Camera Raw and Photoshop. Here are some details on each one:
Photo Mechanic: Crazy fast; makes it so efficient to upload large files. Once you upload your photos to the program you can use colors and words to tag your photos and add metadata (specifics about the image or session). http://www.camerabits.com/
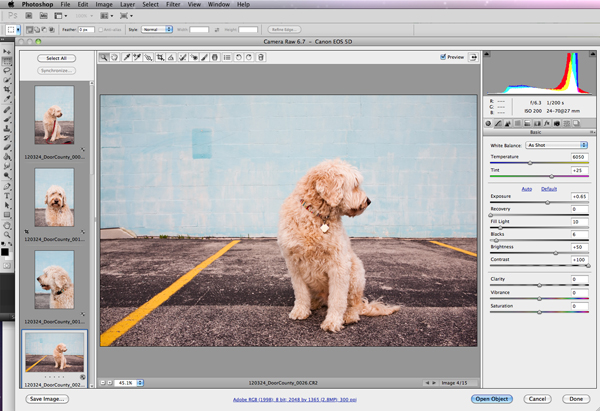
Camera Raw: We will talk file types later on, but the awesome thing about Camera Raw is that it holds true the integrity of the original file. The file quality is amazing and file sizes are large so the print quality remains high. Also in this program you can tone and color correct multiple images at once, which saves a lot of time.
PhotoShop: This is an amazing program and it really works for photographers. I like the file capability and ability to edit multiple images at once.
Let’s talk file type – so important!
Raw: I always shoot in raw. The file quality is the highest you can get. Raw means that it is minimally processed and keeps all the image data spot on and captures light most accurately. Raw files are often called digital negatives, meaning that you can’t print a Raw image, you have to transfer it to another file type. But by keeping a Raw version of an image, you will always maintain the integrity of the image, just like that of a negative.
JPGs: This is the best format to use when posting online. It reduces the file size, but takes away some of the quality of the image (which only really matters if printing in large scale). I’ll save high resolution files for clients to print with and low resolution files that they can post online that are saved in sRGB color space. The images will look more vibrant in sRGB than they would in the original color space.
After the shoot.
After a session comes lots of quality time with my computer. I transfer the files from my camera to my computer (I use CF and SD cards). Then I create a file folder on my hard drive (we will talk about space and storage in a minute). I have to say, the most important thing is labeling the folder appropriately. I have a lot of clients and I have shot so many photos, it is important to stay organized and be able to find a folder when needed.
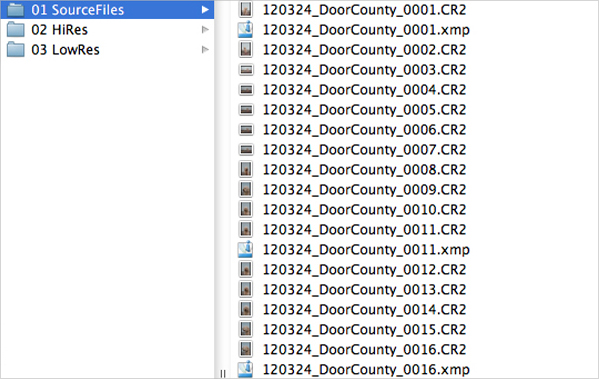
I always start with the session date and follow-up with my subject name, so if the session was on March 24, 2012 and it featured my dog in Door County, Door County I would label the folder ‘120324 DoorCounty.’ I’ve been really fortunate to study alongside a lot of amazing photographers and this file naming convention was definitely a key take-away from those experiences. It makes it really easy to find the files you are looking for. Then, within that folder I make three folders titled 01 Source Files, 02 Hi Res and 03 Low Res. I drop the Raw images into the Source Files folder.
I am going to hijack the work flow discussion to chat about storage and data – such an important part of my job! One thing that I don’t think people realize is that camera memory cards do go bad, so it is important to replace them every year or two. I back up my images three to four times. Seems crazy, right? It might be, but you can never be too safe – the last thing you want to do is lose these important memories. I save all my files on my computer, external hard drives and online. I use Backblaze (www.backblaze.com). It is only $5 a month for unlimited storage and I would definitely recommend it. If you are a Mac user you can use Apple Time Machine, as well. Also, make sure to store at least one hard drive away from your personal computer in case of a fire or flood.
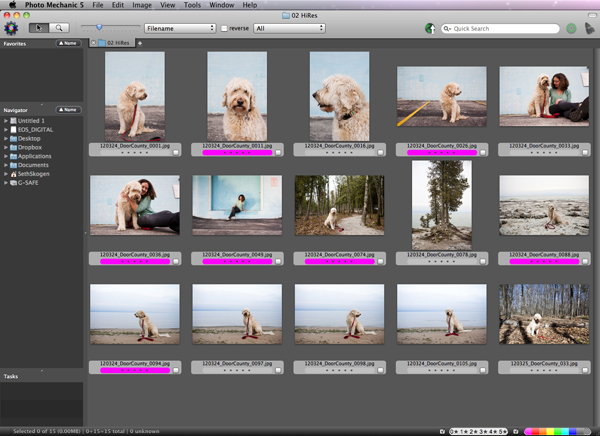
After the files are transferred I open Photo Mechanic. I look through all the images and “tag” the ones I want to share with the client. Once I have picked my favorites, I go through that list of images and tag (in pink!) my absolute favorites (these might be the ones I post on Facebook or send as a sneak peak to the client).
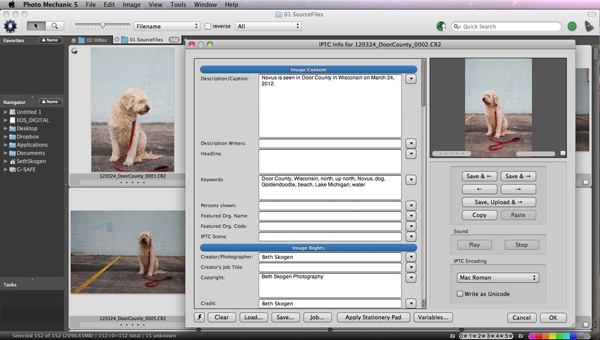
After sorting through the images, I rename the files and insert metadata information. As I mentioned above, metadata should include the image information—I always include my name, contact information, caption and keywords. Make sure to answer the ‘who,’ ‘what’ and ‘where.’ Going back to my session with Novus, I entered: Novus is seen in Door County in Sturgeon Bay, Wisconsin on March 24, 2012. The keywords I used are: Door County, Wisconsin, north, up north, Novus, dog, Goldendoodle, beach, Lake Michigan, water. That makes it easier to search for images months or years down the road. I think it’s important to note that all the metadata is taken off all images when I post online – the metadata is solely for my organization and indexing.
Then it’s time for PhotoShop. I open my favorites at once into the program and take some time to correct the tone, color and contrast of the images. As I mentioned above, PhotoShop is great because I can edit several images at once then just go through each image and then make specific tweaks, if needed. After that step I add those images to the Hi Res folder. Those files are the ones I upload to a password protected PhotoShelter account and share files with my client. Then I make smaller versions of these images and save to the Lo Res folder.
At this point I wait to hear feedback from my client on their favorites and the possibilities are endless; prints, canvases, photo books—there are so many fun and amazing things to do with your personal photos these days. And really, that is the most important part of the whole process!